

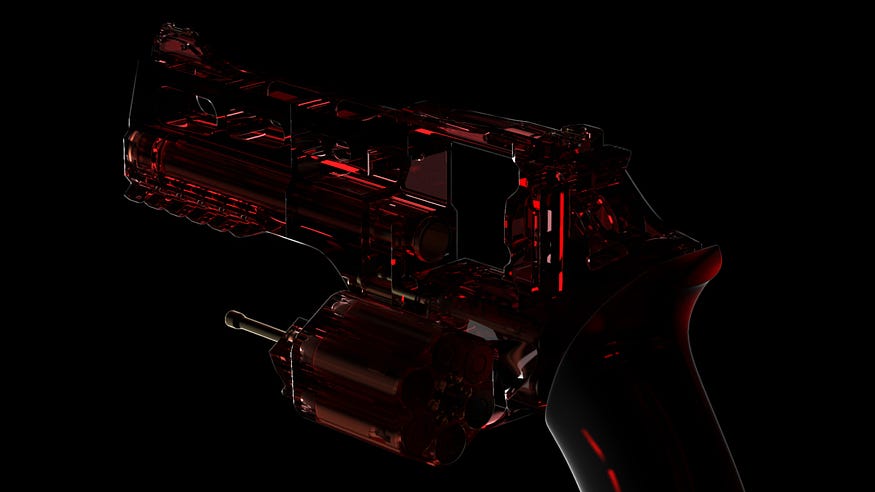
Finding an interesting camera position
Before we light our weapon, we need to find an interesting camera position because without it doesn’t make any sense to start creating lights.
I always use a lower FOV (Field of View) of around 20–24 to create a compressed perspective for capturing the asset in a full format.
Don’t forget to use a safe frame with the wanted aspect ratio of your rendering. Otherwise, your viewport view and render will not match.
Also, make sure that you completed your texturing process and are happy with the results.

Set the first light, Rim Light
After setting everything up, we start with the first light, the Rim Light.
This light is perfect for letting your model pop out from the background. Especially when you have a dark model and a dark background so that both don’t get mixed up and you also emphasize the silhouette better.
Key Light
With the Keylight we’re trying to set up a highlight for the most interesting part of our model and guide the viewer’s attention to the part we like. This light functions as the main light and has to be the strongest one in our scene. It can also be used to create a contrast between areas to make everything even more interesting.

Fill Light
The fill light is used to brighten up the darker areas of our model. Because of this, it is always weaker than the key light.
By brightening up the dark areas, the viewer can see these better and clearer.

Overhead Light
In addition, adding an overhead light gives the rounded shapes better readability.
This also decreases, in our case, the contrast between the side and top area which helps to make everything more readable.
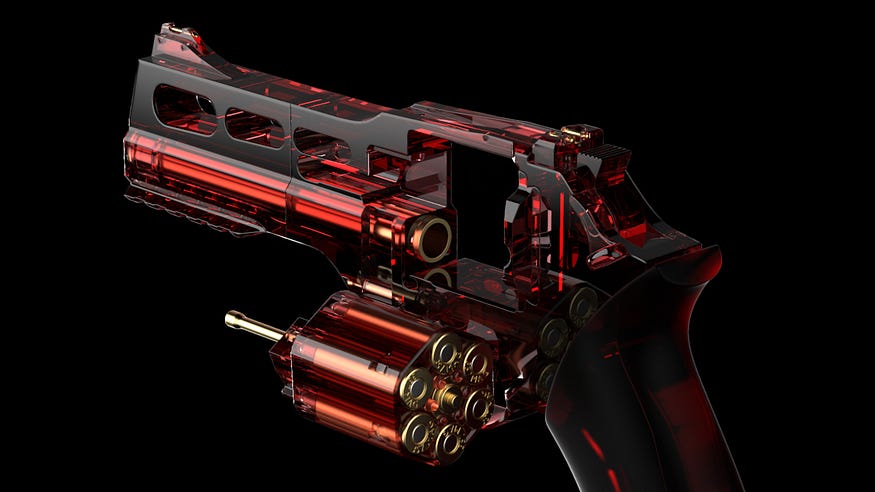
Adding an HDRI
As a final touch, we are gonna add an HDRI to give our model a few more reflections. In my case, I’m using a black/white HDRI but you can also use one which contains more color information. HDRIs make your model look interesting and more lively.

Post-Editing in Photoshop
In our final step, we will use Photoshop to improve our rendering. If available, we can combine our passes like GI, Reflections, Occlusion, etc.
It depends on your render software to support these passes such as Keyshot
What I can also recommend is the Camera Raw Filter. It has very useful settings (under Basic Tab) e.g. Texture, Clarity, Dehaze, Vibrance …
Post-Editing helps your rendering to go that one extra step further.

Conclusion
The goal with lighting is that when showcasing your rendering, the viewer should not have any questions regarding shapes, forms, and material.
Also, be aware to not overdo your lighting, sometimes less is more, and of course, rule number 1 before you model, texture, or light …
Do your research!
I hope this little breakdown helps you with your next lighting.